Metal Clasp & Edge Trim
bag closure with bling!
Coming soon.
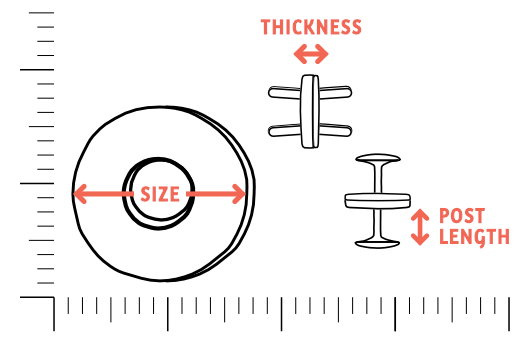
Size Matters
When you buy a metal clasp or edge trim, the size that is indicated typically refers to the width of the item.
The thickness may not always be mentioned, but you will need to check that your finished product with all its layers fits inside the metal.
Common Styles


Metal clasps and edge trims are available in many different forms.
Coming soon.
Select one of the following for magnetic snap installation steps.
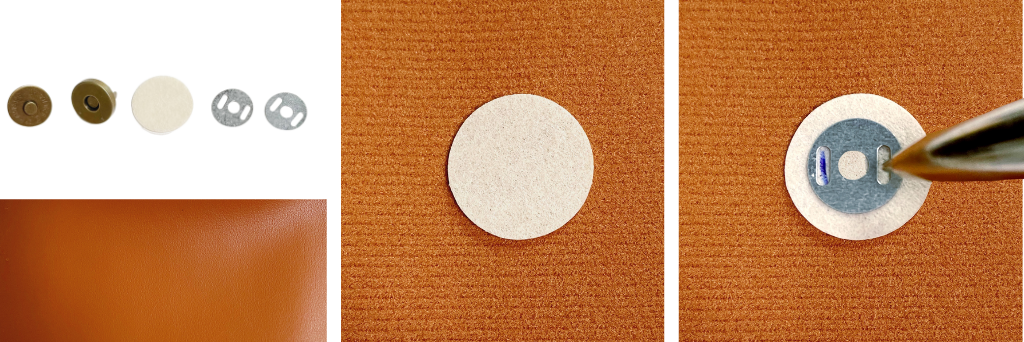
Step 1
Prepare by reinforcing the spots. Use washer to mark the spots where you will make slits to insert magnet.

Step 2
Cut 2 slits and insert the prongs. Place washer over the prongs to prevent tearing later on because of magnetic force.
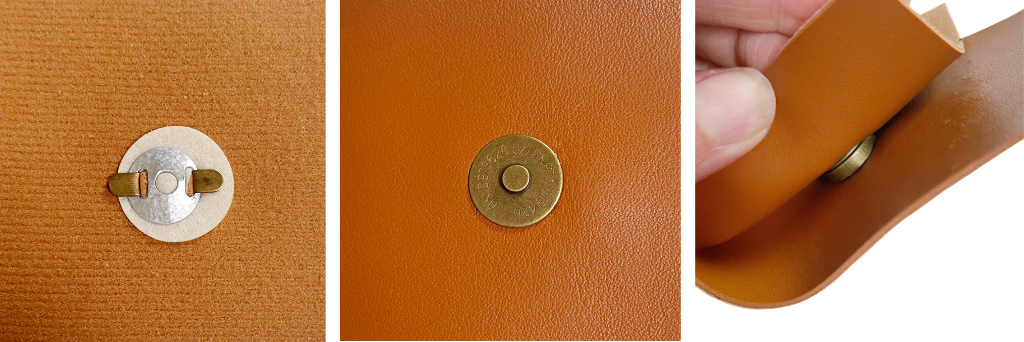
Step 3
Bend down the prongs. Repeat for the other half.
Step 1
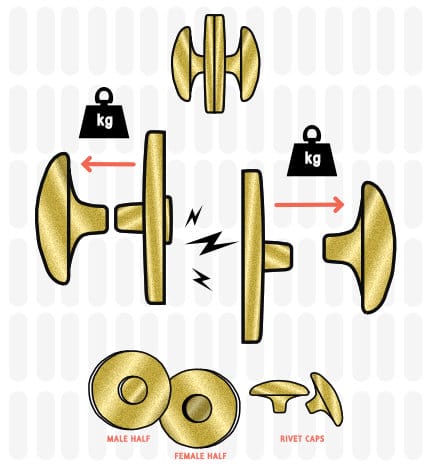
Separate the rivet-capped magnet into four pieces. You can use some force to pull the rivet cap off each side.
There are two rivet caps, one male magnet half (with a protrusion), and one female magnet half (with a depression).
Step 2
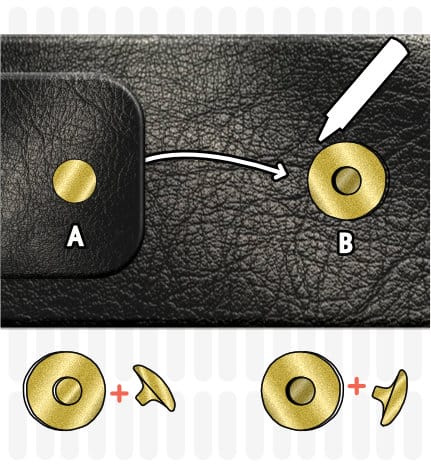
Line up the magnet halves and mark the placement for the rivet holes.
The male magnet half goes on the underside of a flap. The female half of the magnet goes on the main part of the bag.
Step 3
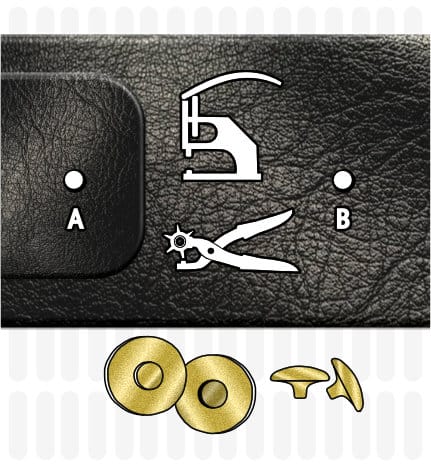
Carefully punch the holes using a handheld tool or table press.
Step 4
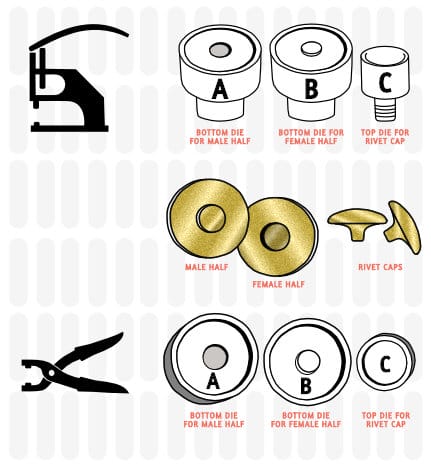
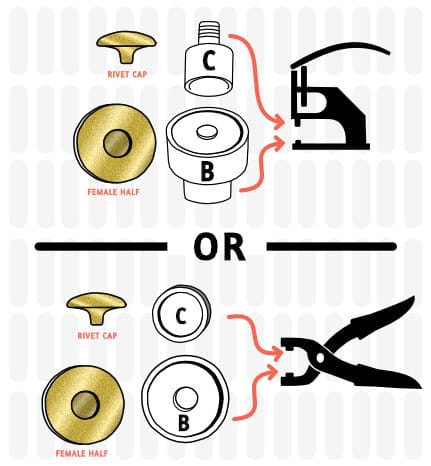
Gather the dies for the tool you will use for installation (table press or Prym Vario pliers).
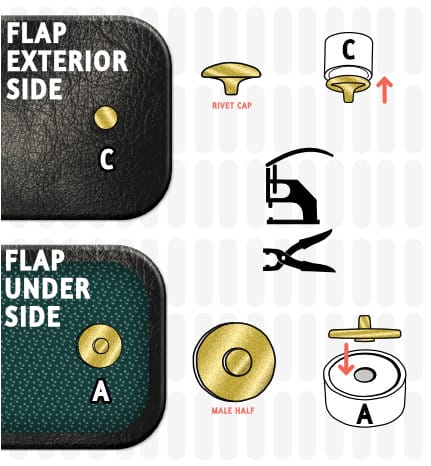
There is one die for the rivet caps (C), one die for the male magnet half (A; this has a depression), and one die for the female magnet half (B; this has a protrusion).
Step 5
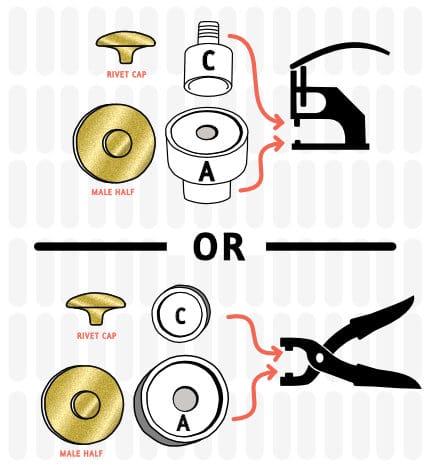
Attach the dies to your tool. The rivet cap die (C) goes on the top. The magnet die (A) goes on the bottom.
We will be installing the male magnet half first.
Step 6
Place the rivet cap through the punched hole (A) so that it is visible on the exterior of the flap. Place the male magnet half through the same hole from the other side, and lightly click the pieces together. The male magnet half should be on the underside of the flap.
Position the male magnet half face down into the die (A) and the rivet cap into die (C). Install using your tool.
Step 7
We will be installing the female magnet half next.
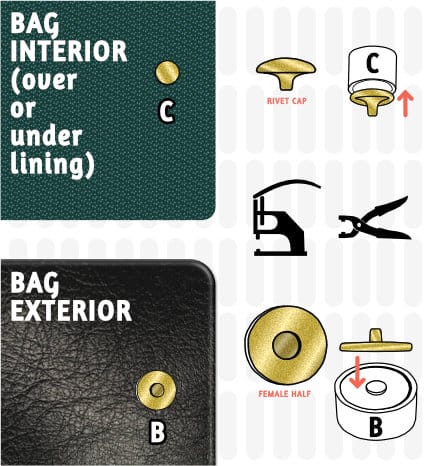
Leave the rivet cap die (C) on the top. The magnet die (B) goes on the bottom.
Step 8
Place the rivet cap through the punched hole (B) so that it is visible on the interior of the bag. Place the female magnet half through the same hole from the other side, and lightly click the pieces together. The female magnet half should be on the exterior of the bag.
Position the female magnet half face down into the die (B) and the rivet cap into die (C). Install using your tool.
Step 9
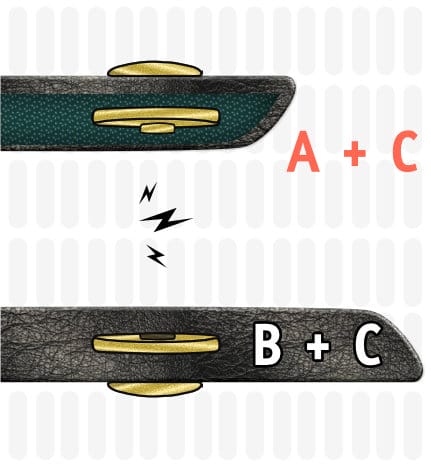
The magnet is installed!
Step 1
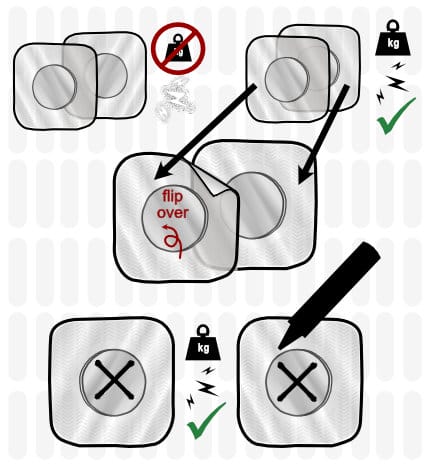
Determine the “right” way the invisible magnet set goes together.
Mark an “X” on the side of each magnet that form the strongest connection without resistance.
Remember that the Xs go together.
Step 2
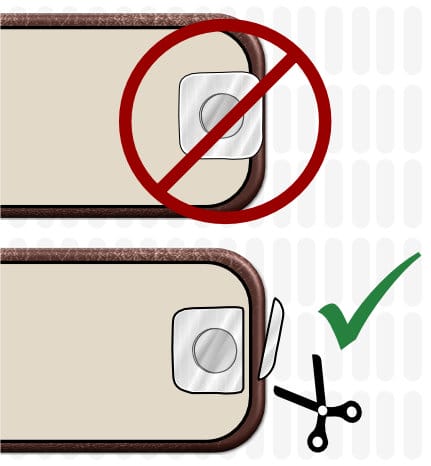
If the magnet will be near a seam or edge, carefully trim the plastic with scissors for a better fit.
Step 3
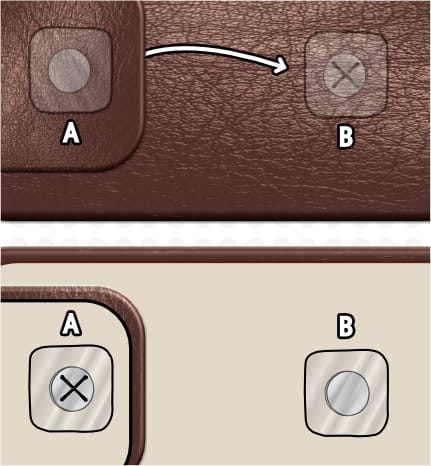
Plan your magnet placement, keeping in mind that the Xs go together.
For example, if you are creating a bag with a flap, the flap magnet needs to be placed so the X is face-up while you are assembling the bag, and the other magnet needs to be placed with the X face-down.
Step 4
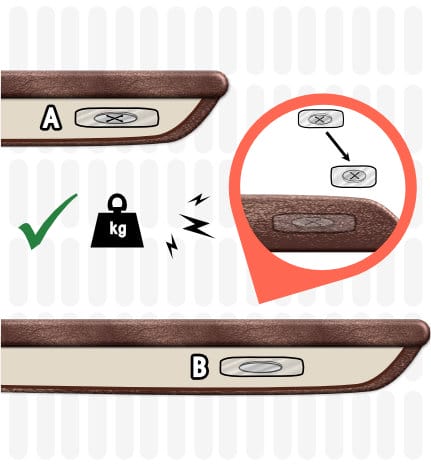
Make sure that the Xs will go together in the finished bag.
Step 5
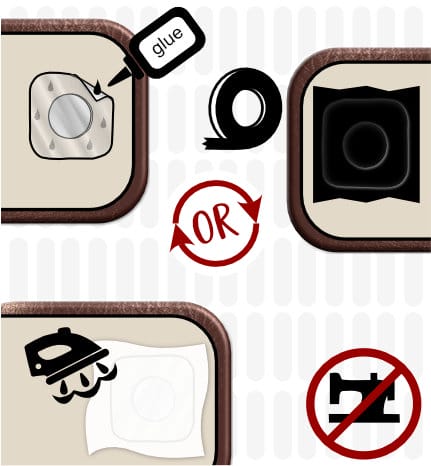
Attach invisible magnets to the bag in one of three ways:
You can use glue on the plastic and press it down into place until dry.
You can cover the magnet with duct tape, either with or without the glue first.
Or you can use fusible woven interfacing the cover the magnet and fuse into position. Take care to not melt the plastic.
Do not sew the magnet in place at all.